Happy Thankgiving Everyone!! I hope you all are having a wonderful day with your family and friends.
Thanks for stopping by and happy crafting!!
Thursday, November 24, 2011
Saturday, November 19, 2011
Peachy Keen Sketch Challeng #65 with a Twist ~ Paper Piecing~
Hello Everyone!! I wanted to share the card I made for the PK Sketch Challenge #65 with a twist ~ paper piecing. I have never done this before and it was fun. I am happy with how it turned out.
 I used the image from Elegant Edges pg. 32 and used my gypsy to hide the heart. I also used the little triangles that were left on my mat for the corners on my card. It just needed some red somewhere else on the card.
 I combined 2 different stamps to get the sentiment.

Recipe:
Cardstock from my stash
CTMH Stamps:
"Happy" from Happy Birthday C1257
"Winter" from Christmas Scripts C1209
Stampin Up Real Red ink
Stampin Up Winter Patches Stamp -mittens
Cricut Cartridges:
Elegant Edges
Thanks for stopping by and happy crafting!!


Recipe:
Cardstock from my stash
CTMH Stamps:
"Happy" from Happy Birthday C1257
"Winter" from Christmas Scripts C1209
Stampin Up Real Red ink
Stampin Up Winter Patches Stamp -mittens
Cricut Cartridges:
Elegant Edges
Thanks for stopping by and happy crafting!!
Wednesday, November 16, 2011
How I organize my Buttons and Odds & Ends
Hi Everyone!! I wanted to share with you another way I organize my craft space. Today I am going to share how I store my buttons and odds & ends. I purchased these little containers at Michaels. They were sold with the jetmax cubes and I believe you got 5 or 6 containers in a package. I recently went back to purchase more and they didn't have anymore. I sure hope they did not discontinue them. I LOVE them because the lids screw on!!
 I don't have a whole lot of buttons so I have other items stored in the containers like googly eyes, jingle bells, large brads, and other odds & ends.
 I have a container for each color button. I LOVE them because when I open the drawer, I can see everything through the clear tops.

 If you are unable to find these containers at Michaels or online, you could use any containers you can find. I just LOVE having them in one of my jetmax drawers and I can see everything I have when I open the drawer!
Thanks for stopping by and happy crafting!!


Here is a close up of the container. These are clear plastic.

Thanks for stopping by and happy crafting!!
Saturday, November 12, 2011
Coffee Gift Card Holder
Hi Everyone!! I wanted to share a coffee gift card holder with you. I made this for the Simply Sunday Challenge over at Getty Cricky blog. I am really happy with how it turned out.
 I didn't have any glossy accents for the coffee so I used a glue stick and let it dry to make the coffee look wet. I used 2 candy canes for the heart! This is going to be for a winter birthday and have a Starbucks gift card inside.
Recipe:
Cardstock from my stash
Stampin Up Night of Navy ink
Close to my heart Happy Birthday Stamp
Cricut Cartridges:
Christmas Cheer (coffee, candy canes
Cindy Loo (gift card holder altered with my gypsy)
Thanks for stopping by and happy crafting!!!

Recipe:
Cardstock from my stash
Stampin Up Night of Navy ink
Close to my heart Happy Birthday Stamp
Cricut Cartridges:
Christmas Cheer (coffee, candy canes
Cindy Loo (gift card holder altered with my gypsy)
Thanks for stopping by and happy crafting!!!
Thursday, November 10, 2011
Wanna win the Cricut Art Philosophy bundle package?
Just wanted to let everyone know that Mandy over at My Passion for Scrapbooking is giving away the Cricut Art Philosophy cart bundle package. Click HERE to go to her site and register to win!!
Thanks for stopping by and happy crafting!!!!
Thanks for stopping by and happy crafting!!!!
Wednesday, November 9, 2011
Rosette made from MS Elegant Cake Cart
Hi Everyone!! Today I want to share with you 2 rosettes I made using the Martha Stewart Elegant Cake Cartridge. (You CAN use the cake carts in other cricut machines. I have an expression and it works.) I used the doily border on page 77. I used a solid blue cardstock for the one rosette and a colored stripe for the other. For the blue rosette, I used the "PHRASE" feature and it was cut at 1 x 9". If you look in your booklet, it will give you the different measurements for each feature. Now for the colored stripe rosette, I used the same "PHRASE" feature 1 x 9". However, I used my gypsy and sized it at 1.5 x 11.5". I wanted you to make 2 rosettes because I know everyone doesn't have a gypsy. Click HERE if you missed my rosette tutorial.
 I put a button in the center and didn't really like it. It just needed something more.
 So I removed the button used some ink and inked up the edges and stamped "Thank You" in the center. I like it much better. My daughter said it looks like a flower!
 Recipe:
Paper from my stash
Close to my heart twilight ink
close to my heart Say it in Style stamp set
Circle punch
Martha Stewart Score Board
Cricut Cartridges:
Martha Stewart Elegant Cake
Thanks for stopping by and happy crafting!!


Paper from my stash
Close to my heart twilight ink
close to my heart Say it in Style stamp set
Circle punch
Martha Stewart Score Board
Cricut Cartridges:
Martha Stewart Elegant Cake
Thanks for stopping by and happy crafting!!
Tuesday, November 8, 2011
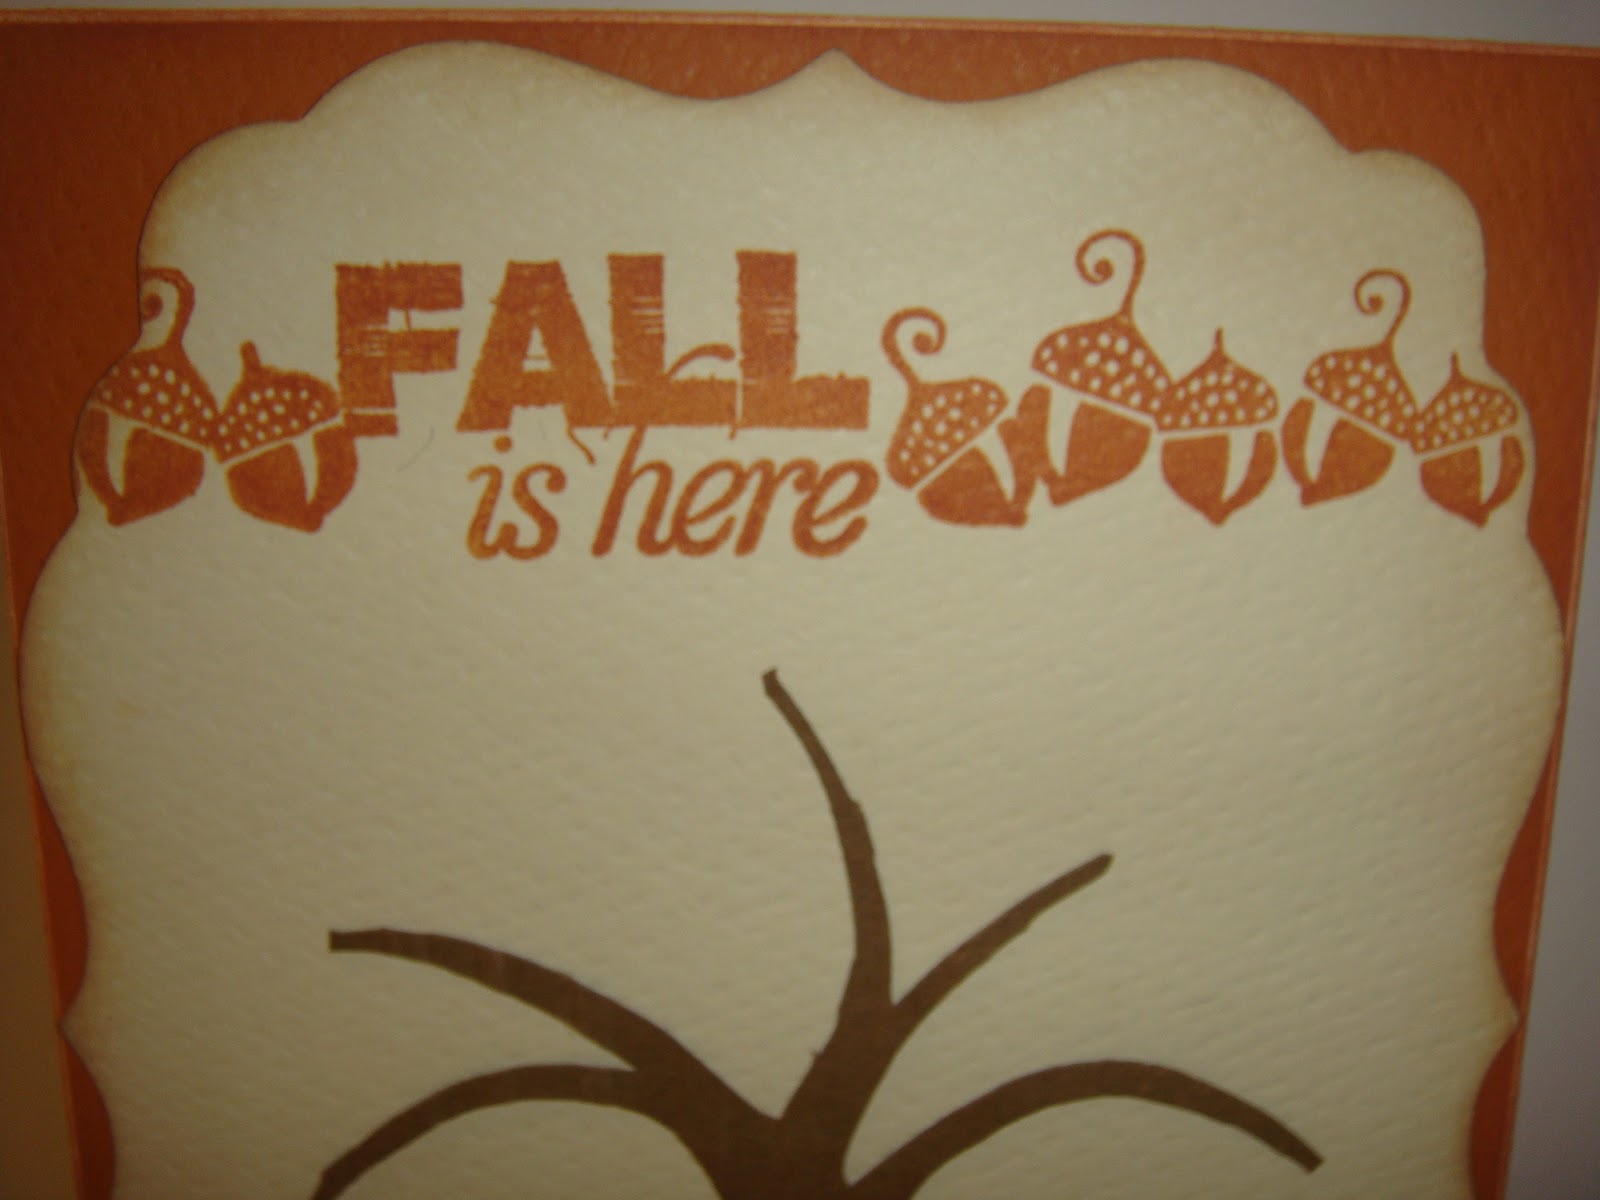
"Fall is Here" Card
Hi Everyone! I wanted to share a card I made for fall.


 Recipe:
Fall cardstock
Colorbox Burnt Sienna ink
Brown ink for squirrel
Studio G stamps (squirrel, sentiment, acorn border)
Pop Dots
Cricut Cartridges:
Gypsy Wanderings (leaves)
Cindy Loo (tree, background (cream cardstock)
I am entering this card in the following challenges:
My Craft Spot
StuckOnUSketches
Exploring Cricut
Thanks for stopping by and happy crafting!!
Monday, November 7, 2011
After Halloween Clearance Scrapbook Finds
Hi Everyone! I wanted to share with you all the great Halloween clearance finds I found at Walmart. My Walmart had tons of great Studio G Halloween scrapbooking products for $.97 (regular price). I purchased a few things before halloween just to make sure I got them. I went to Walmart on Wednesday and Halloween stuff was 50% off. SO I picked up a few items. On Saturday it was 75% off and picked up a lot of items. Sunday was 90% off and I cleaned them out. Here are some pictures of what I bought. This is only half of what I bought. I went back and cleaned them out. On Sunday, the items were only $0.09!!!!! I got paper, glitter glue, ink pads, stickers, chipboard, brads, clear stamps, wooden stamps, and ribbon. I am sooooo happy and I am totally set for Halloween next year!!


 I hope they get studio g items in for Christmas!!
Thanks for stopping by and happy crafting!!


Thanks for stopping by and happy crafting!!
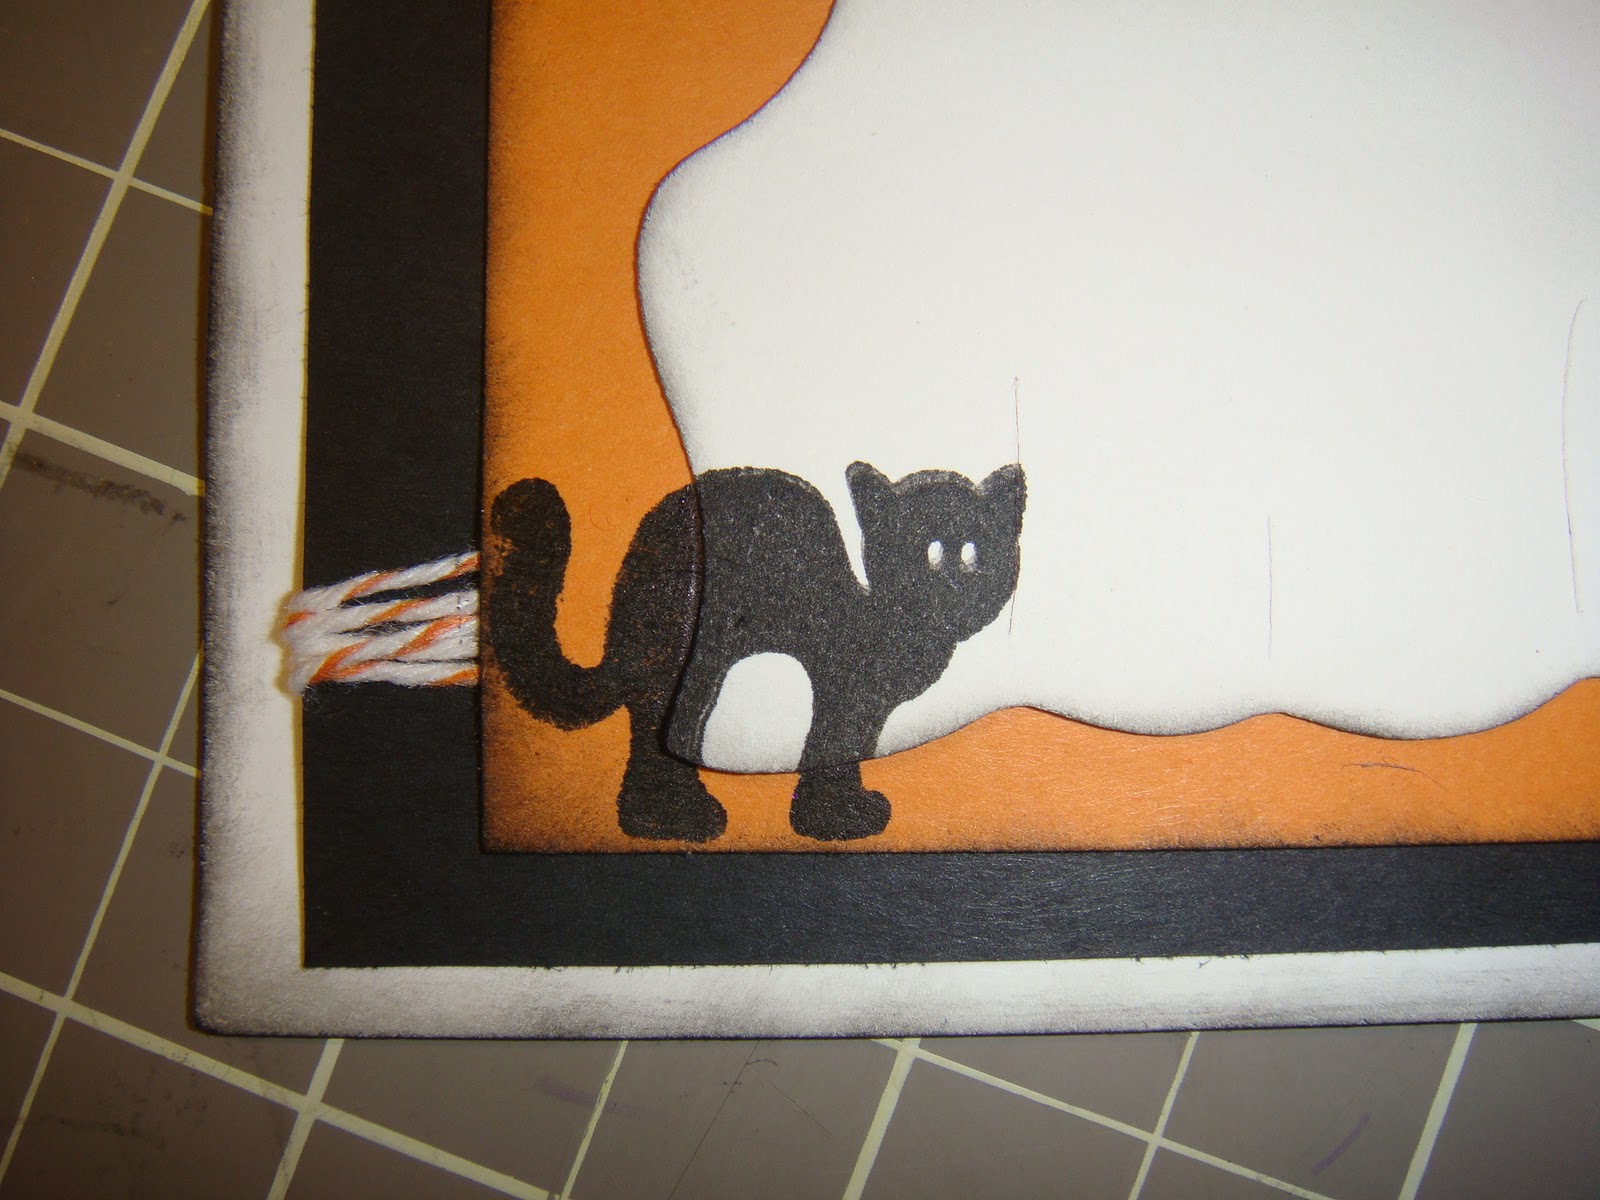
Halloween Card for Peachy Keen Challenge
Hi Everyone! This is my last Halloween card and it is for the Peachy Keen Challenge. I LOVE this little ghost and have seemed to use it alot this year. It is so adorable with a PK face stamp. I wanted to keep this card simple.
 The Happy Halloween stamp is a studio G stamp.
 I stamped the cat over the ghost. I really liked how it turned out!
 The witches hat is stamped in purple ink and then I added studio g glitter glue over it.

Recipe:
Peachy Keen In Stitches face stamp
Studio G stamps: Happy Halloween, cat, witches hat
Studio G glitter glue
Black & orange scrap paper
Orange twine
Paper Doll Dress Up Cricut Cartridge (Ghost)
Black and purple ink pads
Thanks for stopping by and happy crafting!!


Recipe:
Peachy Keen In Stitches face stamp
Studio G stamps: Happy Halloween, cat, witches hat
Studio G glitter glue
Black & orange scrap paper
Orange twine
Paper Doll Dress Up Cricut Cartridge (Ghost)
Black and purple ink pads
Thanks for stopping by and happy crafting!!
Wednesday, November 2, 2011
Baby's First Birthday
Hi Everyone! I wanted to share with you decorations from my baby girls first birthday using my cricut and Peachy Keen face stamps. I had so much fun making these decorations. I LOVE the way this cake turned out!

I punched 2 flowers and 1 circle for each cupcake and glued the toothpick between the 2 punched flowers. It was super easy.


I got these blowers at the Dollar Tree and ripped off the original decoration and glued on my flower.

I found this craft paper also at the Dollar Tree. I wrapped up the presents and used light pink sheer ribbon (also from Dollar Tree) for the smaller tube packages. I used light pink tule for the bow on the large package.

Recipe:
Peachy Keen Basic Paper Doll Face stamps
pink tule
sheer pink ribbon (Dollar Tree)
brown/chocolate grograin ribbon from my stash
LargeFlower punch from creative memories
Circle punch (for center of flower)
chocolate chip ink pad from Stampin Up
Cricut Cartridges:
MS Elegant Cake Art (Font)
Storybook (label)
Create A Critter (leaves)
Thanks for stoppy by and happy crafting!!!
Tuesday, November 1, 2011
How I Store My Cricut Cartridges
Hi Everyone! I wanted to share how I store my Cricut Cartridges. I bought a ClosetMaid cabinet with doors from Target. It has adjustable shelves and I also store my Cricut Expression on the bottom. I actually have 2 rows of cartridges on each shelf. You can also stack the cabinets if you have more than one. I have 2 side by side. It keeps everything looking neat and clean. Also helps keep the dust off ( I HATE dusting)! And they go perfectly with my jetmax cubes. I LOVE them.


 I am planning on sharing other organizing tips throught the weeks to come, so stop back and see how my organizing is coming along! I have an organizing button on the right hand side of my blog.
Thanks for stopping by and happy crafting!!


Thanks for stopping by and happy crafting!!
Subscribe to:
Posts (Atom)